|
How to Build |
|
Introduction
There are many instances where a portable Allstar node would be useful. It would be great to have for emergencies, a vacation trip, or just to take Allstar out on the road. This article describes a simple and compact way to do just that using easily obtained parts. The Raspberry Pi 3 in wireless mode is used to connect to the Internet but you could certainly use wired mode with any of the boards if desired.
Parts required
Here is a list of parts I used for my portable node. There is no requirement that you use these exact parts if you have something equivalent on hand or you would like to use for instance a different case, radio, etc.
- Raspberry Pi 3 and case (with hamvoip.org image and wireless package)
Available at many sources - Microcenter in store price $29.95 - DMK-URI or equivalent radio interface or Modified USB FOB - $5 to $70
- Case - shown is Harbor Freight - $15
http://www.harborfreight.com/11-12-x-7-12-x-4-12-aluminum-case-69316.html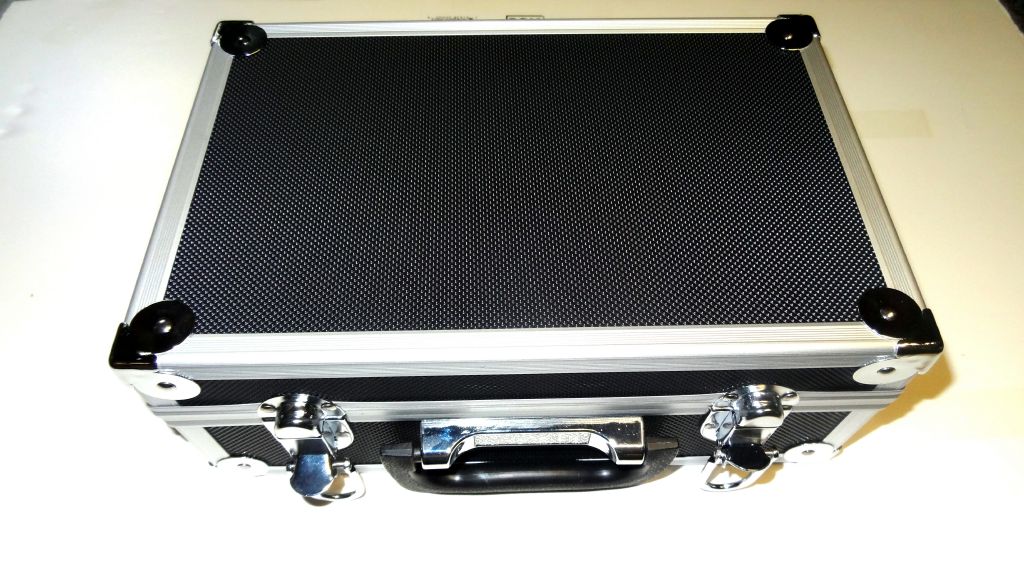
- HDMI monitor 7" - $60 and wireless keyboard - $18
https://www.amazon.com/gp/product/B012ZRYDYY/ref=oh_aui_detailpage_o01_s00?ie=UTF8&psc=1
https://www.amazon.com/gp/product/B00I5SW8MC/ref=oh_aui_detailpage_o01_s00?ie=UTF8&psc=1 - Baofeng 888 UHF 1W radio - $14
https://www.amazon.com/BaoFeng-BF-888S-Two-Radio-2pcs/dp/B00ECW9DB4/ref=sr_1_cc_1?s=aps&ie=UTF8&qid=1467947772&sr=1-1-catcorr&keywords=baofeng+888
The 888 requires modification - see Baofeng 888 Mod howto - Other radios could be used. - Power source - +12 and +5 required.
12V to 5V 3A car adapter - $3
http://www.ebay.com/itm/Better-Waterproof-DC-DC-Converter-12V-Step-Down-to-5V-Power-Supply-Module-3A-15W-/380794929775 - Cables
External Antenna connector for Baofeng - around $5
https://www.amazon.com/DHT-Electronics-Handheld-Antenna-Quasheng/dp/B00COKNKS8/ref=pd_sim_147_1?ie=UTF8&dpID=312y8YjJR1L&dpSrc=sims&preST=_AC_UL160_SR160%2C160_&psc=1&refRID=Q3K6QS3E4HZ6TENFDE72
https://www.amazon.com/Handheld-Antenna-Wouxun-Baofeng-Quasheng/dp/B00B3CWT8A
Short HDMI cable - $5.25
https://www.amazon.com/High-Speed-Cable-meters-Black/dp/B000QKKAOU
Alternative to using a monitor and keyboard
An alternative to using the monitor and keyboard in your portable node would be to use a mini router. The ZyXEL Wireless N 3-in-1 Travel Router available at Amazon would be a good choice. It has a WAN, LAN, and Wireless capability and is the $20 range so less than a monitor and keyboard. You would use this router to connect your wireless hotspot to your portable Pi via a wired connection. You would then use a putty (ssh) type application on your smart phone, tablet, or laptop to setup your wireless access on your portable node. The device running the ssh application would talk wireless to the router and the router would connect to the Pi via a wired connection from its LAN port. The WAN port would be unused. You could determine the login IP address by using a DTMF sequence to say it over the radio (when activated in rpt.conf) or by web logging into the router. Then connect to the Pi using the IP address and port (default 222), Login and run the wireless setup to connect to your hotspot or wireless connection and set its passphrase. More information on using the Pi wirelessly can be found in the wireless how-to.
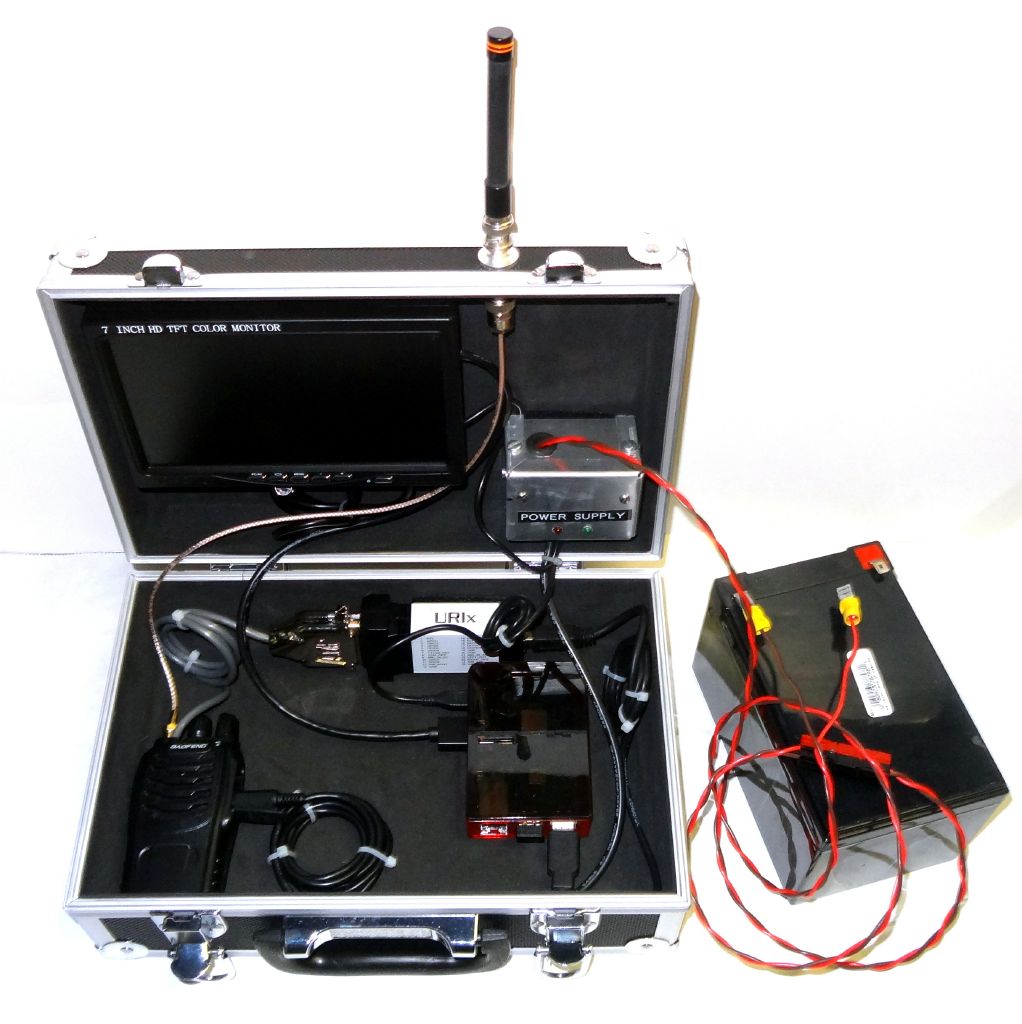
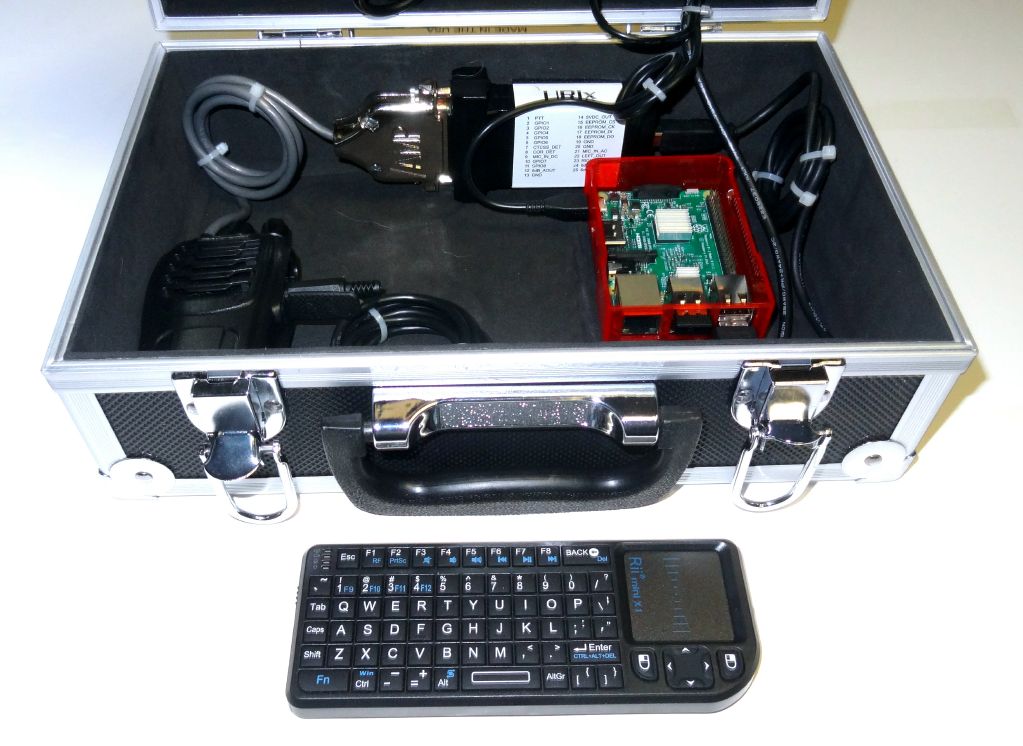
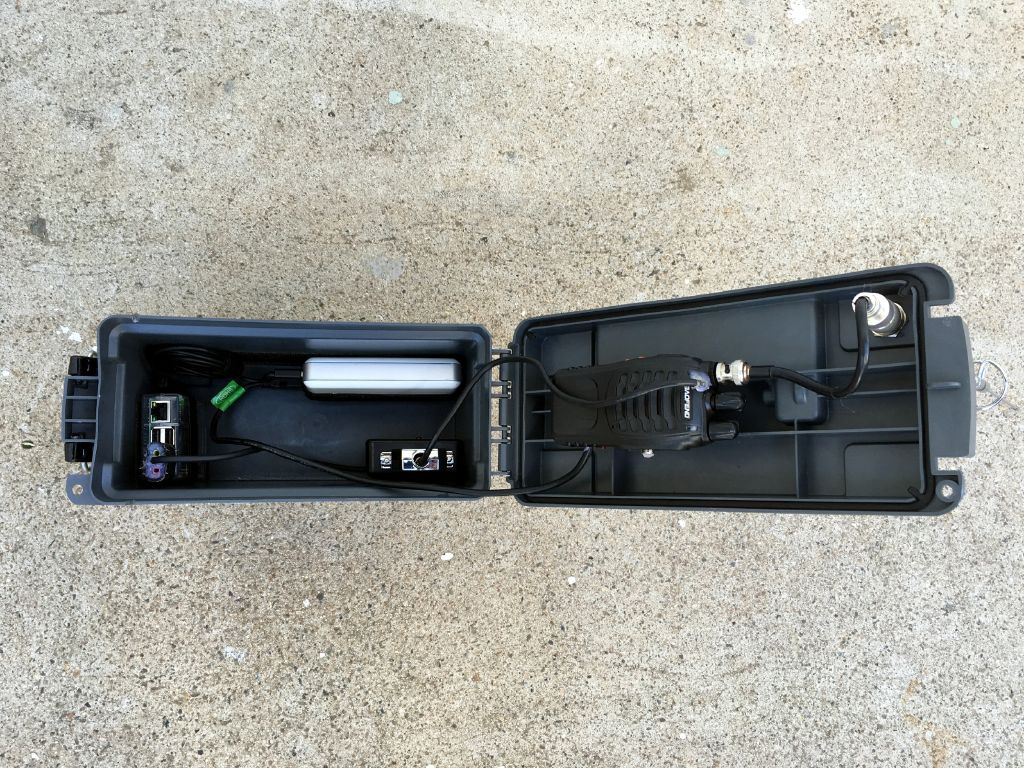
Here are some photos of the finished product.
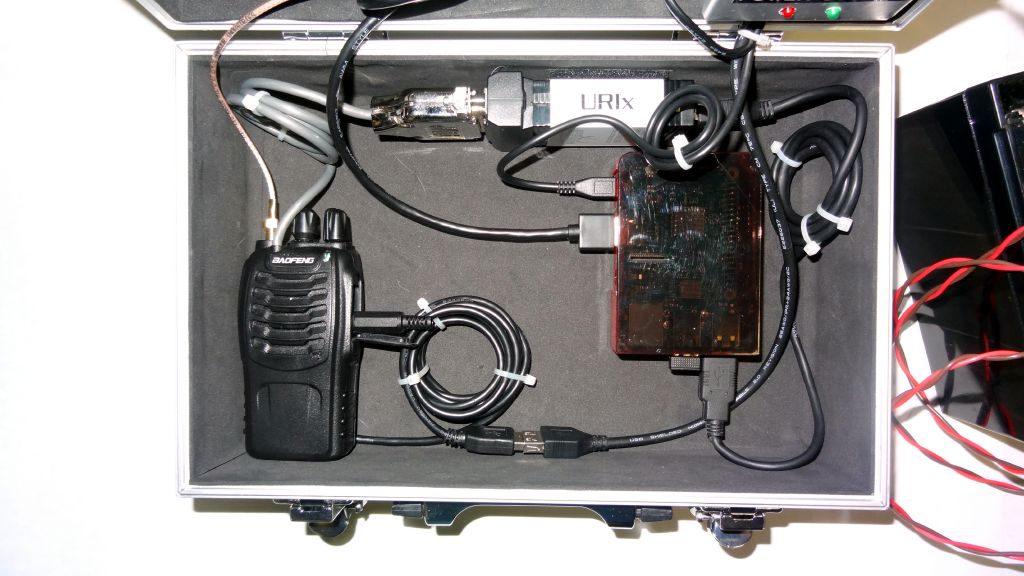
All items are held in place with Velcro. Get the large strips of Velcro with glue backing. It works very well. I custom made my antenna jack using a short piece of Teflon coax, a male SMA and a bulkhead BNC connector with a BNC short whip antenna. The cables shown in the parts list would be an alternative.
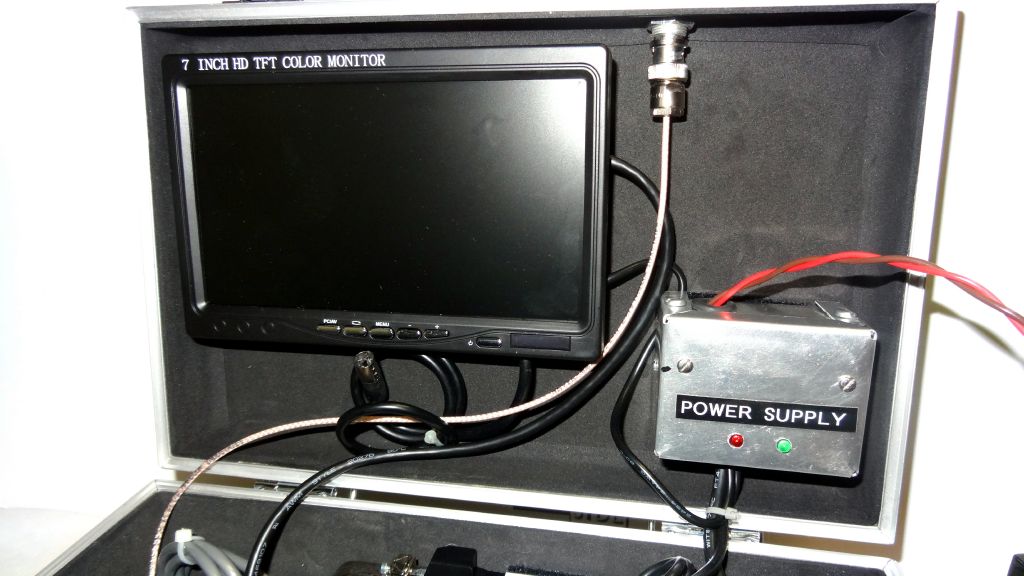
The power supply uses the 12V to 5V converter housed in a small minibox with some capacitive filtering (.1 and several hundred uf electrolytics) of the 12V and 5V lines. The 12 volt output feeds the HDMI monitor. The coax power cord was cut to the appropriate length and directly connected to the 12V source. The 5V output feeds both the Pi and the Baofeng 888. The Pi uses a micro USB connector for power and the Baofeng is wired with a standard USB for power. Both are directly fed from the 5V source.
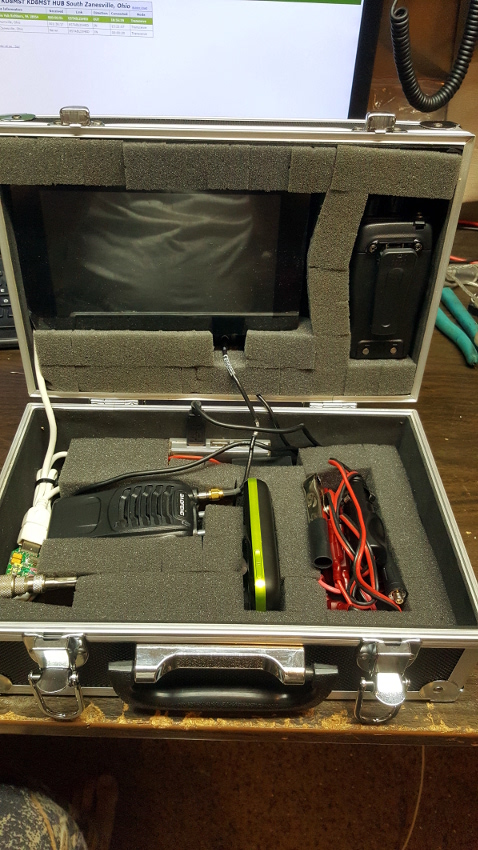
The monitor is connected with a short HDMI cable. The extra hardwired video connector on the monitor is tied off. The keyboard is wireless. The FOB is installed in one of the Pi USB slots. The charging cable for the keyboard can be stored in another Pi USB slot and the cable left laying in the base of the case. The keyboard sees little use so charging would rarely be needed.
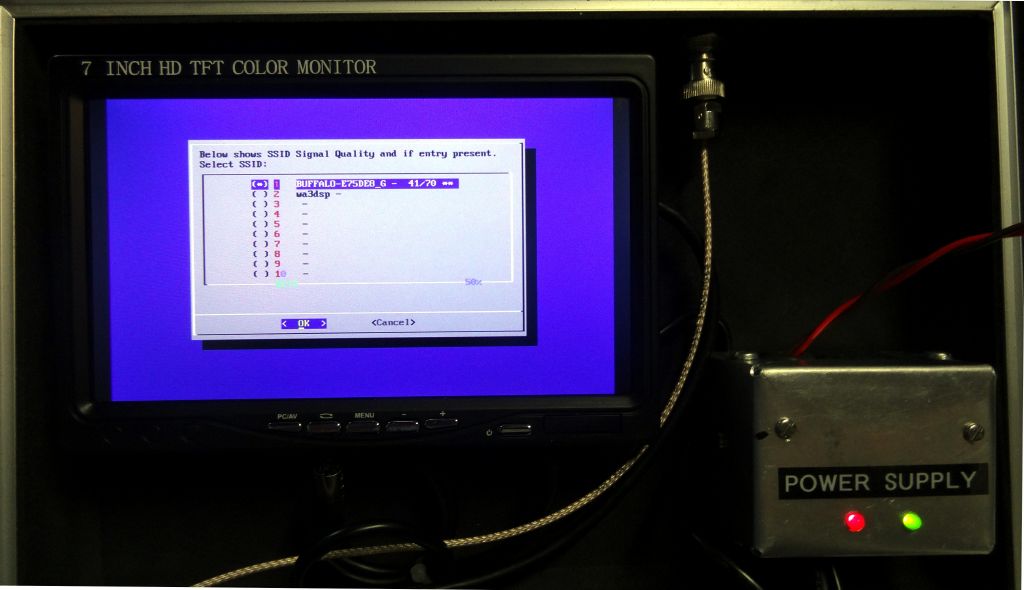
The next photo shows the screen displaying wireless scan mode. You would select your wireless access point by SSID and on the next screen you would be instructed to enter the passphrase.
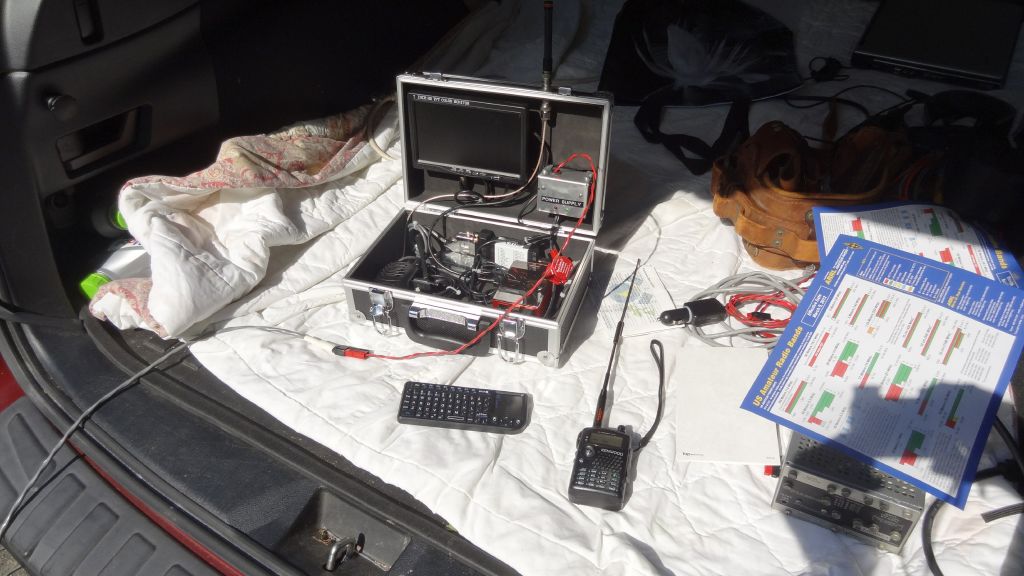
This photo shows the entire package with a 12AH gel cell battery which would run the portable node for at least 12 hours on a charge with the HDMI monitor turned off. With supplemental solar a truely remote off the grid 24/7 node could be installed assuming you had wireless Internet access nearby.
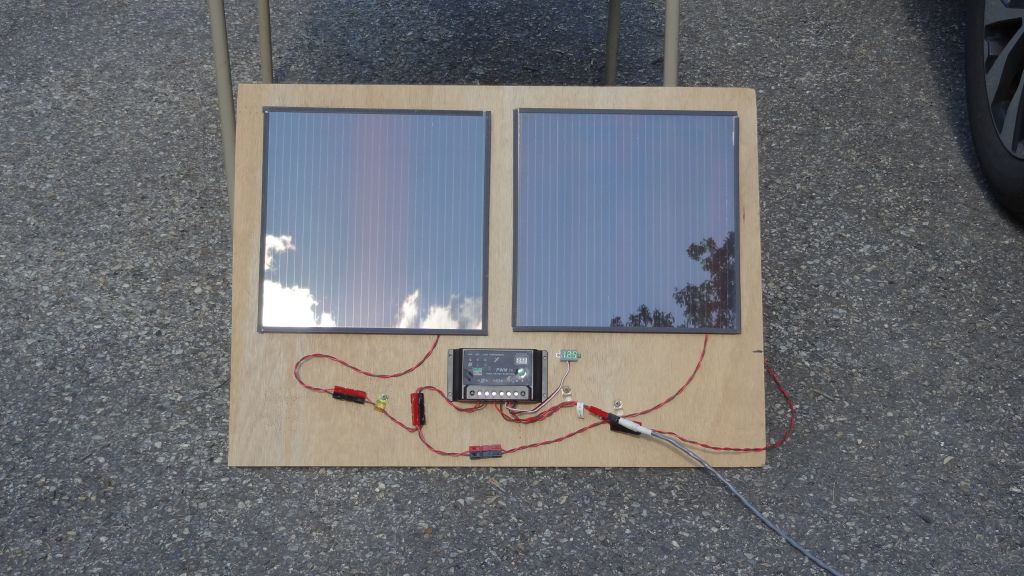
On Field Day 2016 I used this portable node which covered the entire site with an Allstar connection back to my hub. It was entirely run on battery power with solar charging. Access was via wireless to a cradlepoint router and Verizon cell card located at a tent about a hundred feet away. If you added a cell phone with hotspot capability powered from this portable node you would have a complete "take it anywhere you have cell coverage" node.
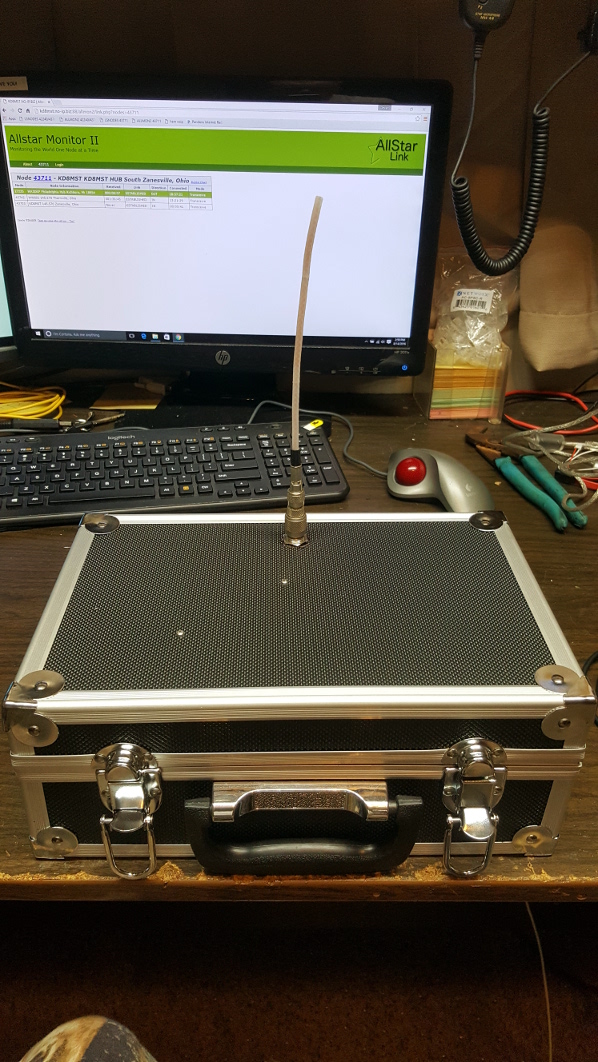
Node built by WA3DSP
Another design without a monitor
Here is another design which does not use a terminal and keyboard but instead the Zyxel portable router. See the description of this method above and links to the product and setup below. You would use a smart-phone, Pad, laptop or other device to connect to the wireless router and then to the Pi through a wired connection to administer the Pi's wireless access point. This eliminates the need for a monitor and keyboard and reduces the cost of the portable node considerably. Should a user wish to use an external keyboard and monitor the connections are there to do it.
This node was built for KL3BD, Bob Douglass. He will be using it with his smart-phone in Kotzobue, AK thirty miles above the Arctic circle.
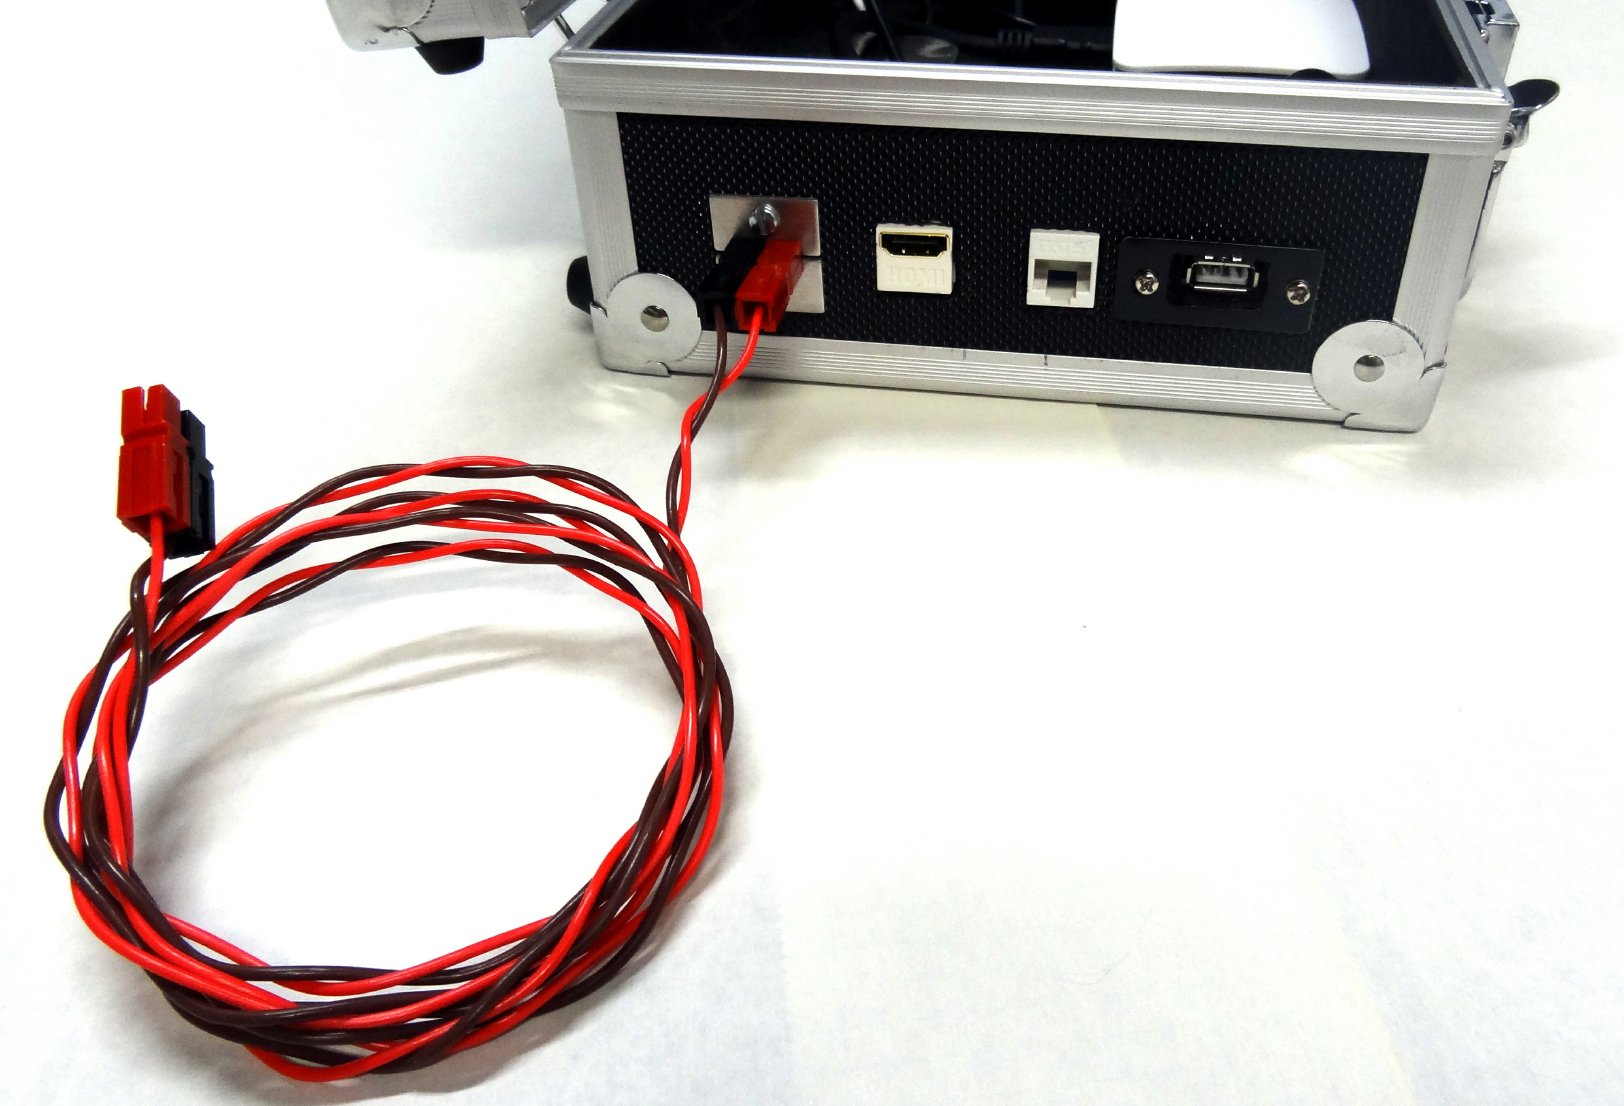
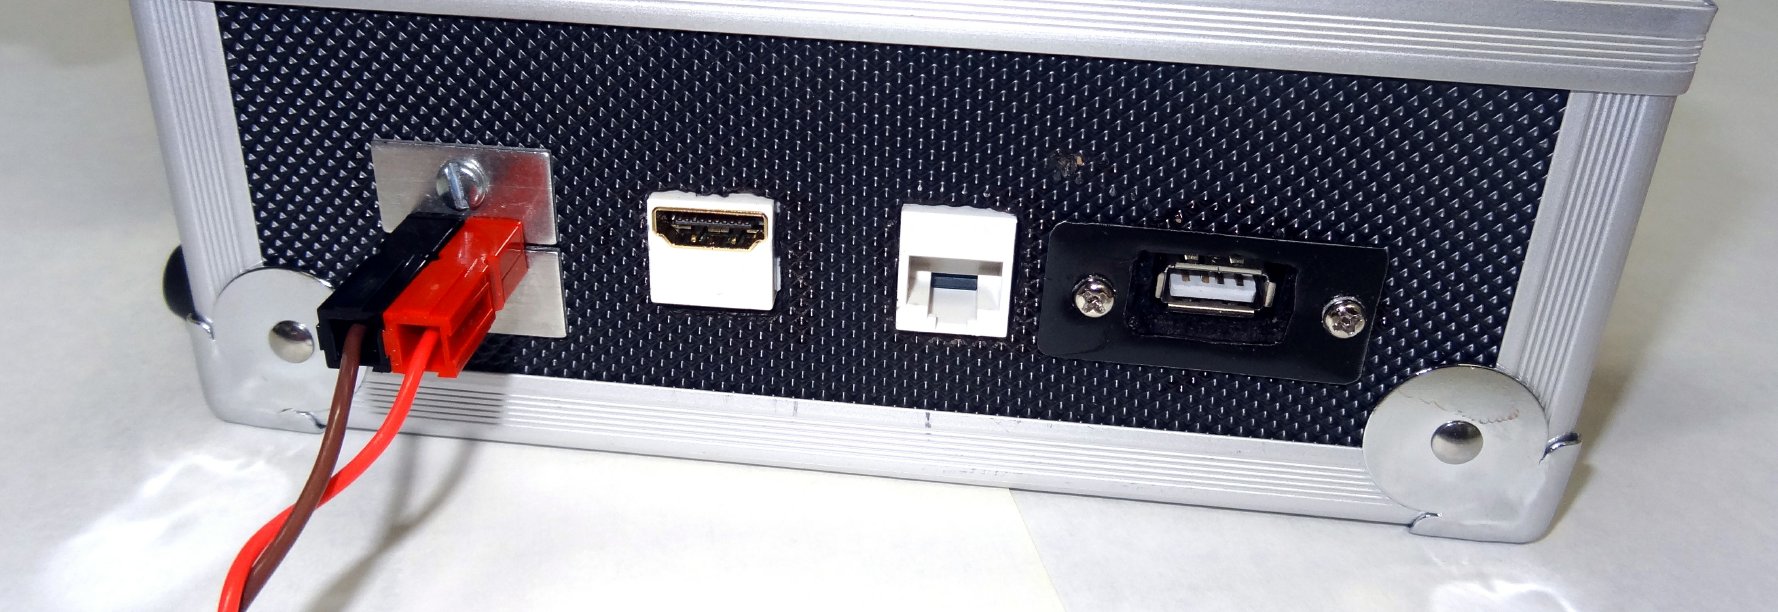
All connections are brought out through connectors. Left to right, 12V power via a powerpole connector, HDMI, Ethernet, and USB.
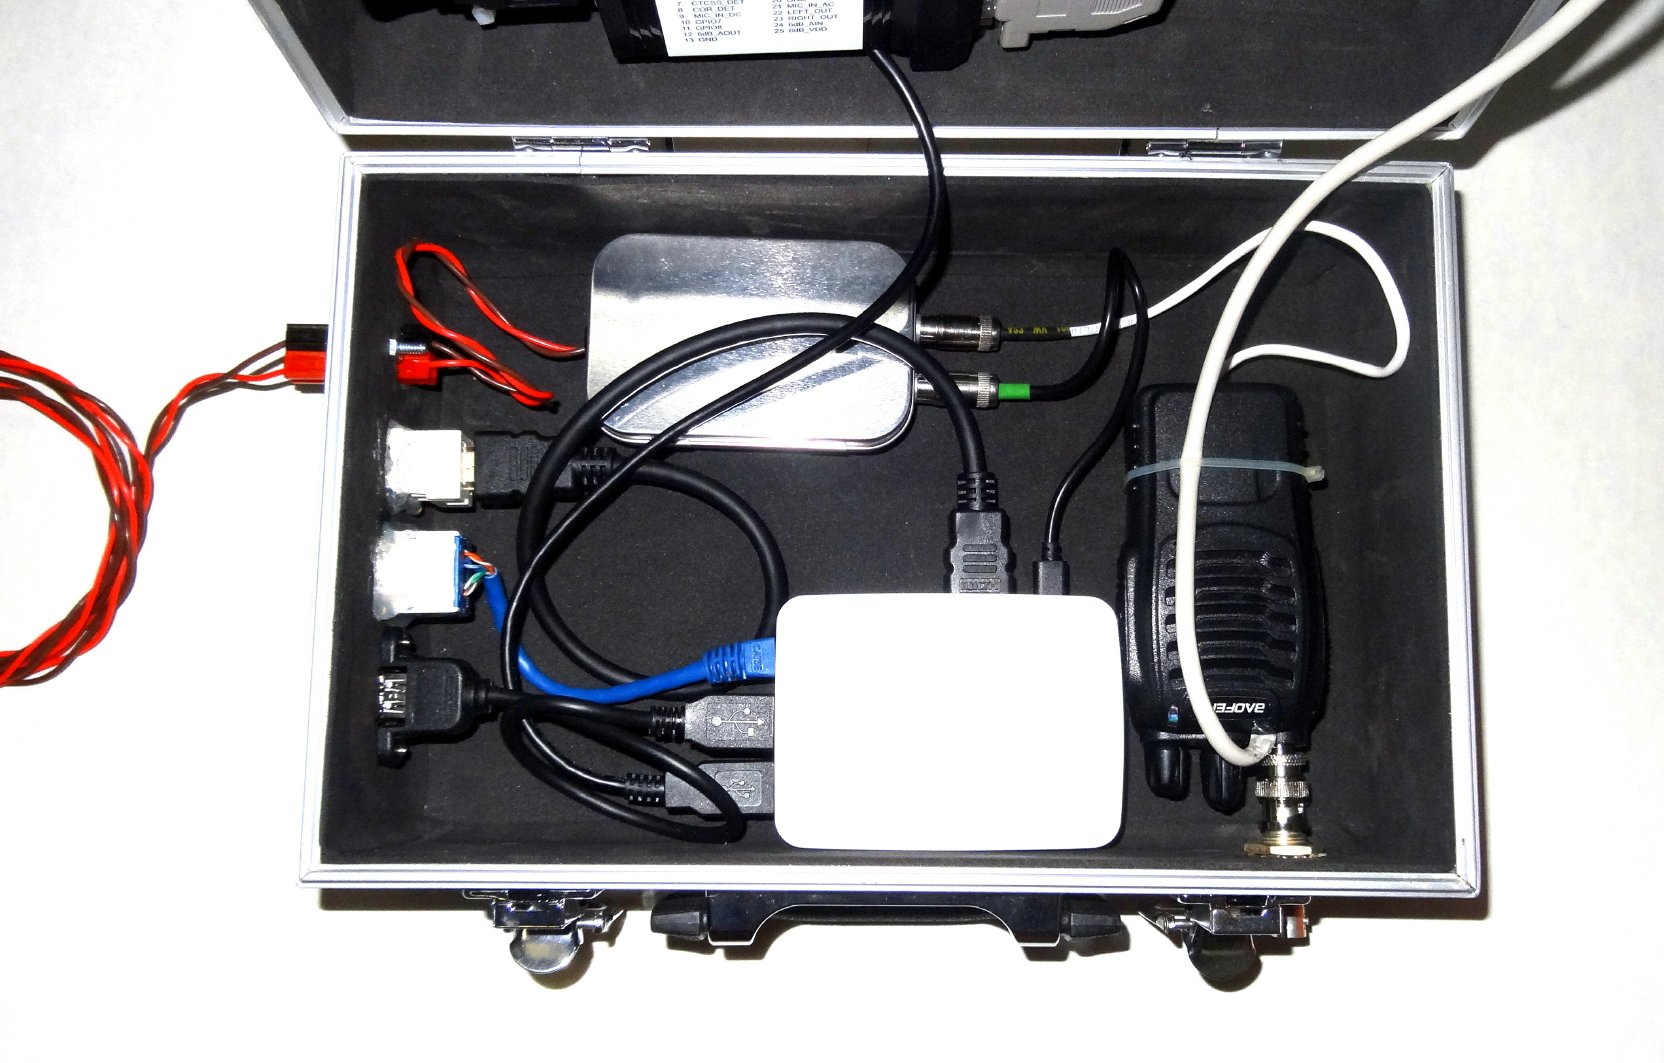
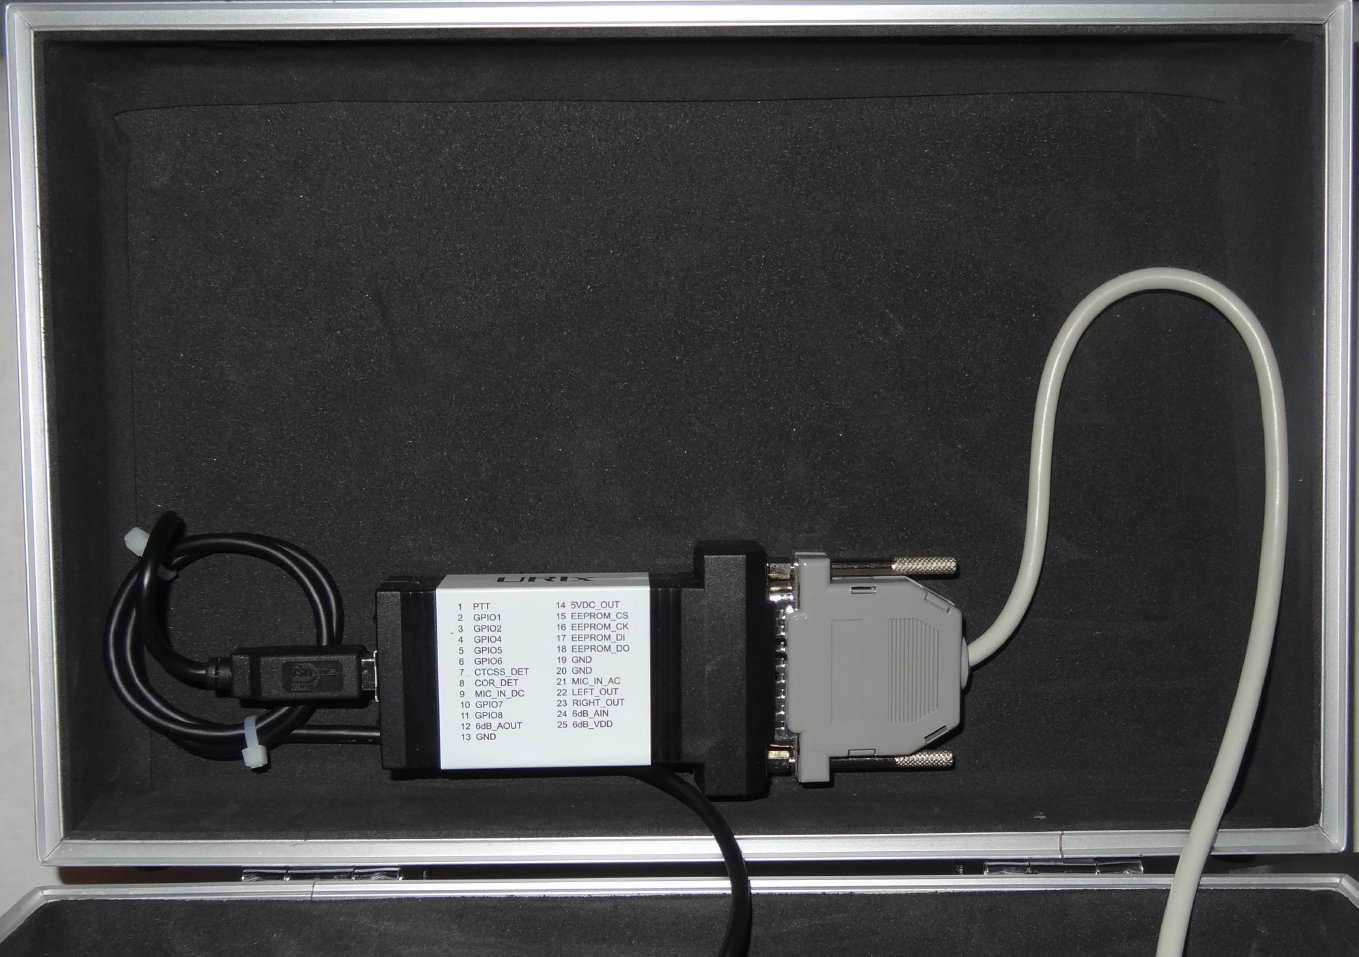
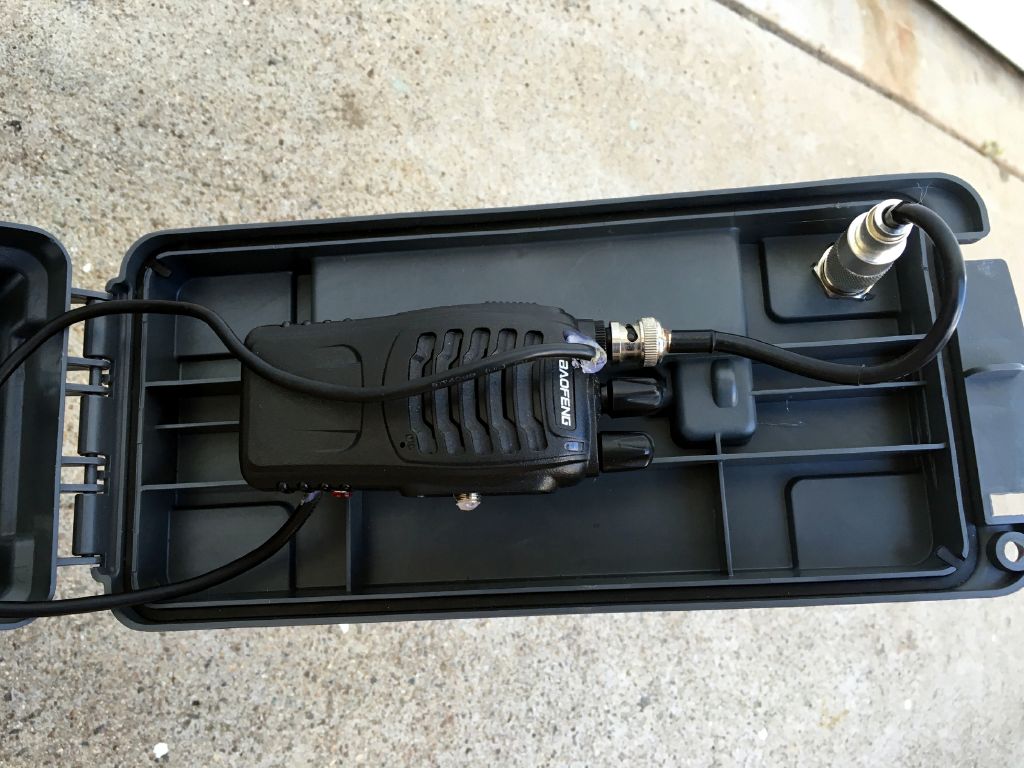
The Baofeng 888 is mounted at the right with an SMA to BNC adapter, a double male BNC and a double female BNC bulkhead through the case. The Pi3 in its case is mounted center bottom. A 12 volt to 5 Volt car adapter along with line filtering is mounted in the tin at the upper center. The DMK-URI is mounted in the lid. Like in the first example all items are mounted with heavy duty Velcro available at Walmart an many other suppliers.
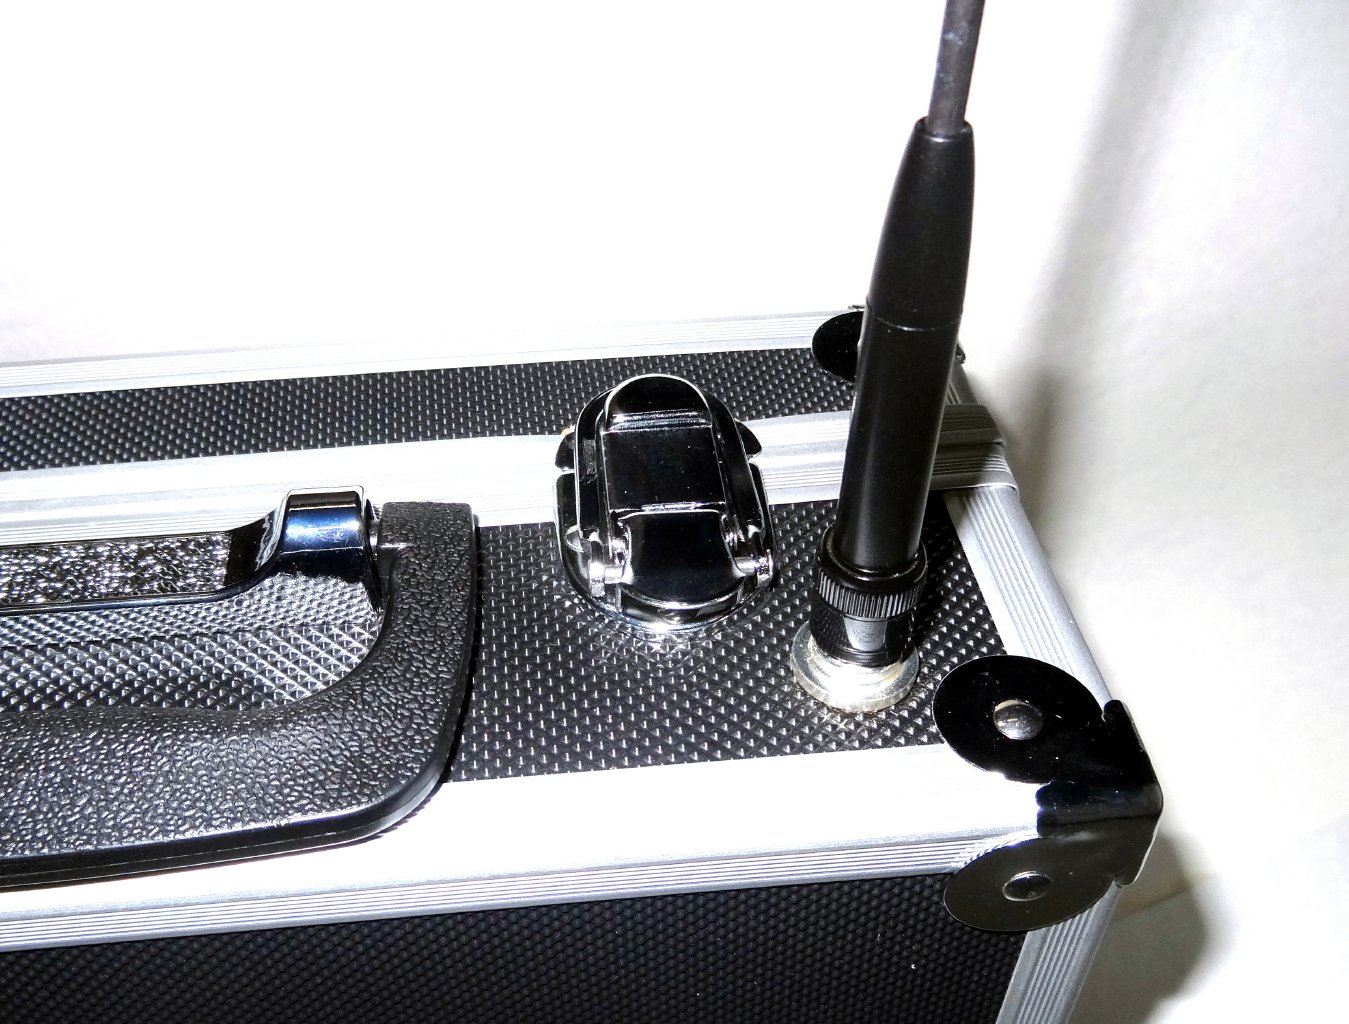
This photo shows the BNC antenna connected.
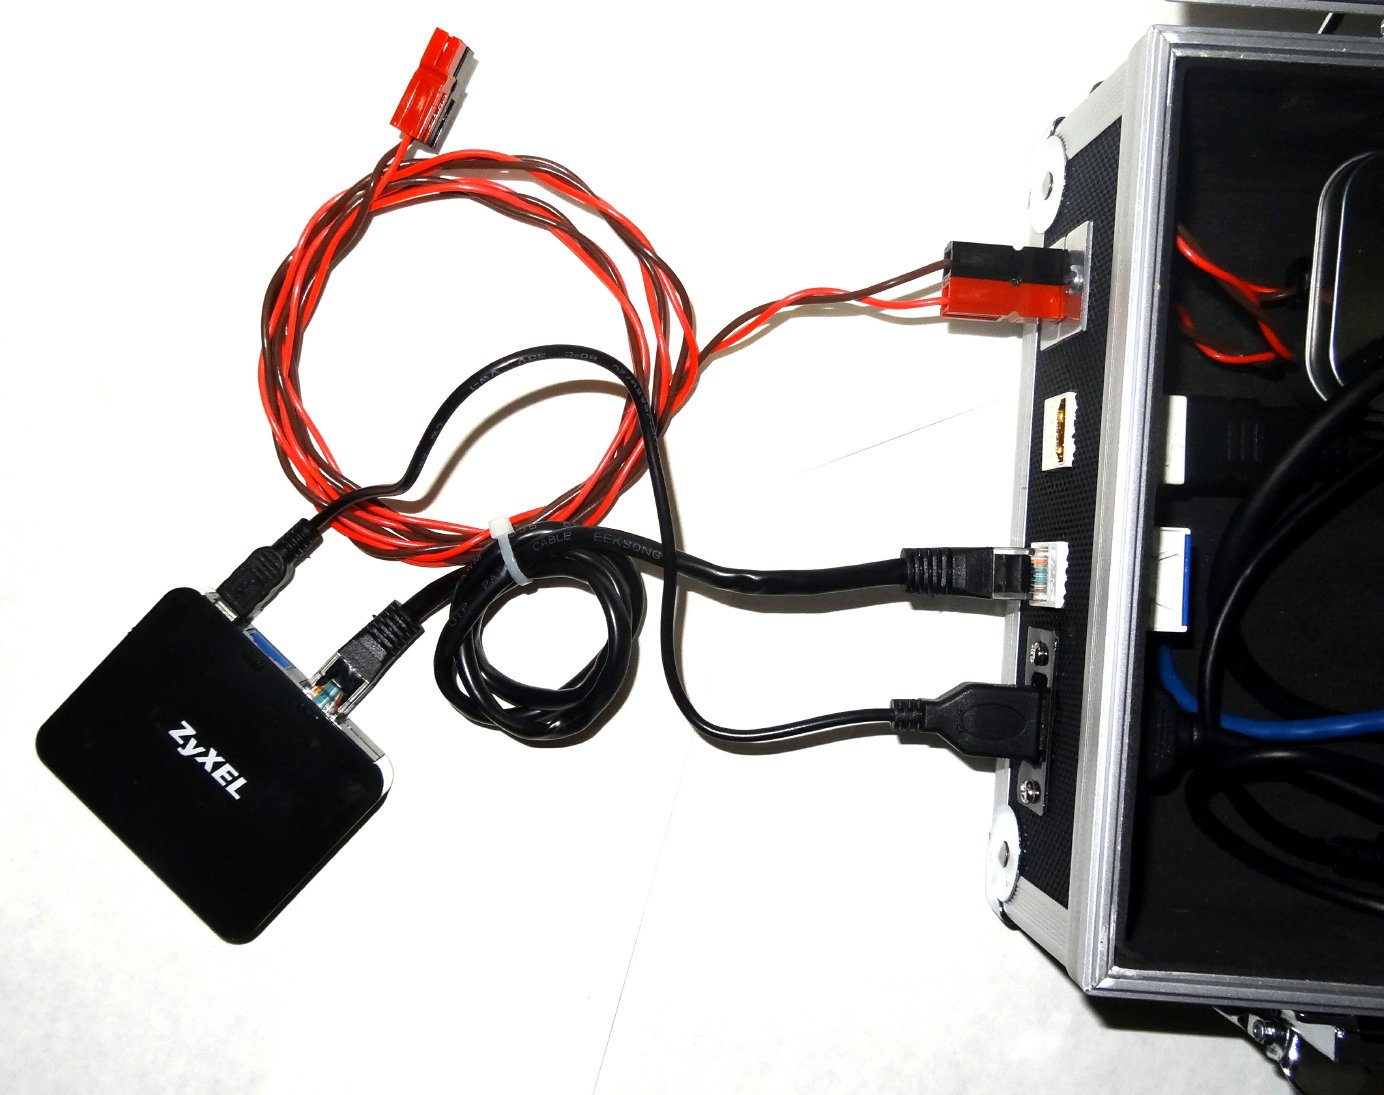
When using the portable modem it would be connected in this way. Power from the USB connector and Ethernet from its LAN port to the Ethernet connection on the portable node.
- ZyXEL Portable Router
- Setting up the Zyxel router
- Another possibly better router choice. Better specs and cheaper - 11/30/2016
Node built by WA3DSP
Software
I used the latest, as of this writing, hamvoip.org V1.02 RPi2/3 image with the version 1.7 wireless package. See the hamvoip.org main page download section. Future updates will have the wireless code pre-installed.
Conclusion
This is a fun project that adds a new dimension to Allstar, the ability to go portable. This is just an example of how I did it. Feel free to experiment and come up with your own design and above all have fun!
Other Designs
Do you think we will be looking at the photos on this page 30 years from now
and viewing them like this one from the past!!!

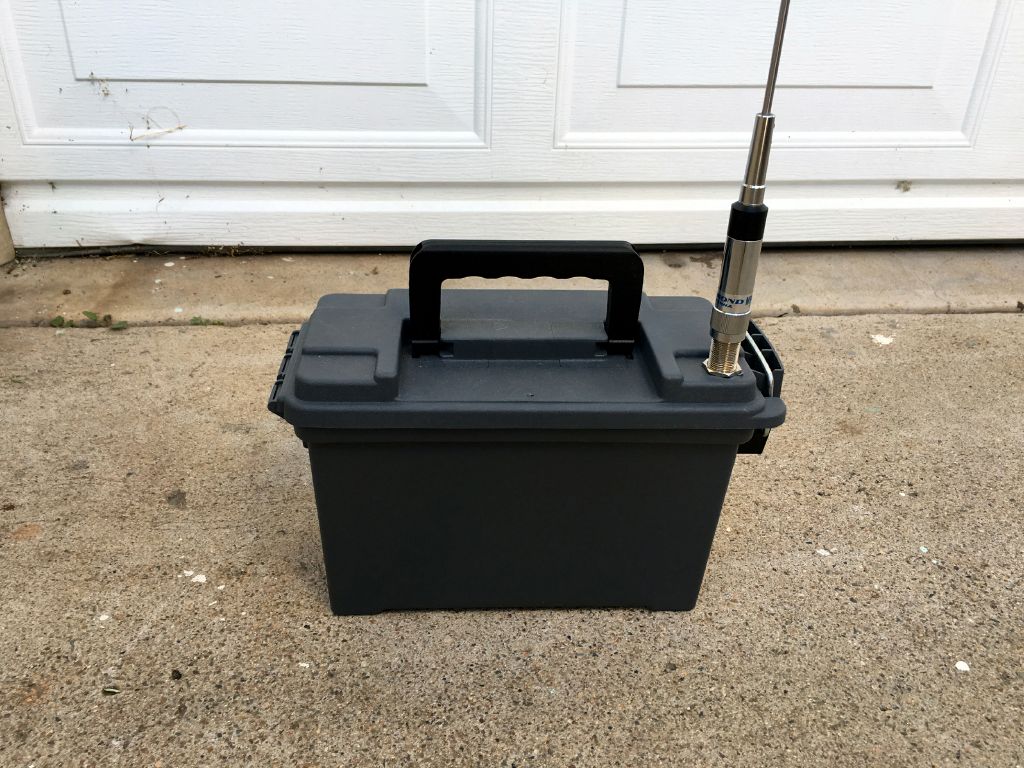
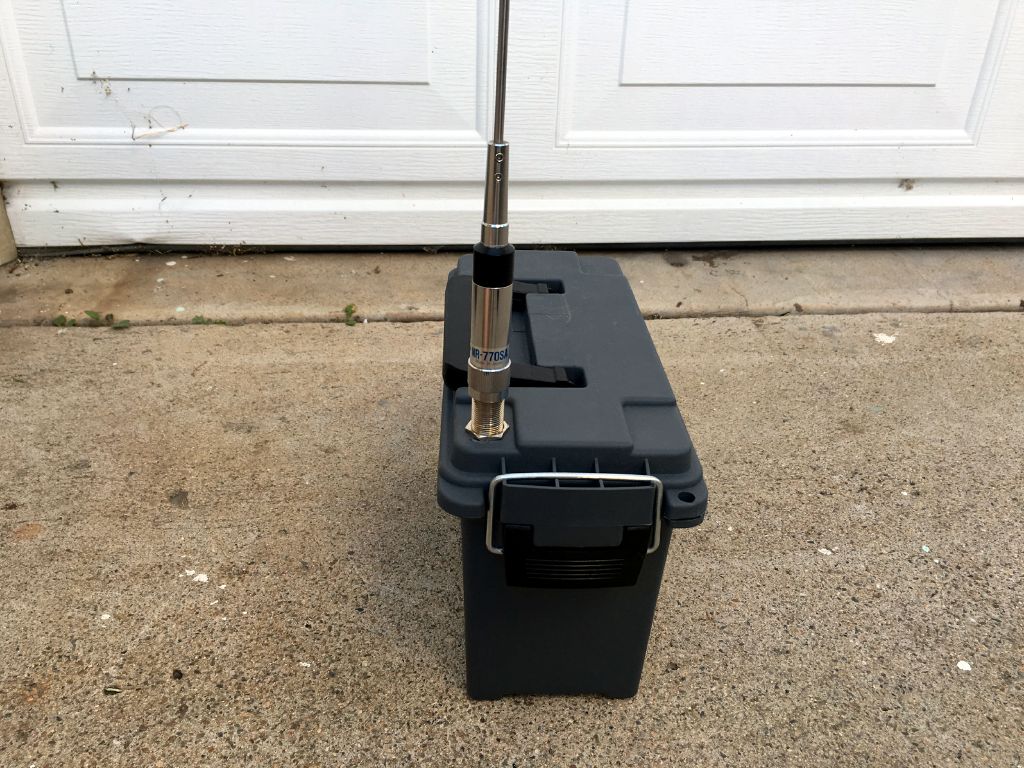
Here are some photos of a design by Mani, KH2FI. He built his portable node in an ammo box available at Harbor Freight using a Baofeng 888. He uses a modified sound FOB with the interface parts in a separate box and a rechargeable USB battery for power.

More photos of a design by KD8MST -
A link to KC9ONA's portable node photos and information - http://43834.kc9ona.com/
WB3DZZ built his node neatly into a wooden box with all of the connections through the side panel. See his design HERE
© 2016 - WA3DSP